
What You Need to Know To Capture Your Best Sound
Having the right microphone preamp and knowing how to use it is the first step in creating great recordings at home or in the studio. The mic pre is the source of your sound outside of your unique playing style, so loving the sound of your mic pre is no small detail.
Choosing the right microphone preamp to capture your sound starts with understanding what the mic pre can and can’t do for you. That’s why we created a quick guide to help you choose and use the right microphone preamp.
In this guide, we’ll cover how to choose a mic preamp based on your sources & setup and provide a few examples. We will also talk a bit about gain staging basics to make it easy to pair your preamp of choice with other outboard gear.If you’re looking for a basic overview of mic pre functionality and its role in the signal chain, check out our beginner’s guide for better recordings.
Preamp History, Sound Profiles, & Examples
Right out of the gate, we’ve got to consider what we’re going to record and what sound we’re trying to achieve. Understanding what instruments or sources we are going to record and what our preamps do well will help us to choose the right tools for the job.
Everything we add to a signal path has a sound profile, preamps especially so. Some preamps are designed to be deliberately “clean” where the only benefit we receive is more volume. Many “lifter” products and active DI’s aim to achieve this sound. For professional analog recordings, we usually seek a little more color and vibe out of our preamps.
A Transatlantic Tale
Like so many things in music gear, the most sought after preamp sounds come from the United States and the UK - with spirited debate over which preamps reign supreme.
American “12-Style” Preamps: History & Sound
The “American” flavor of 12-style preamps were developed by API in Chicago for recording consoles in the late 1960’s and were featured on some of the most famous albums from the 70’s and beyond. Compared to older preamps in circulation, the 12-style preamp colors much “slower” than say the 73-style British preamp. What that means is that the 12-style preamp has more clean headroom before the extra sound coloration from the transformer hits. This does not mean that a 12-style pre has no analog color! Compare the sound of a discrete 12-style pre to some “clean” sounding preamps or inferior interface preamps, and you will be shocked at the punch, warmth, roundness, and space added by the circuit. Drums, bass guitar, vocals, acoustic guitar, and many sources benefit from the percussive, clean headroom from 12-stye preamps.
12-STYLE AMERICAN-VOICED PREAMPS:
British “73-Style” Preamps: History & Sound
The famous “British Console Sound” was created and perfected by Rupert Neve throughout the 1960s in Cambridge and later in Little Shelford, England. By 1970, the very first solid-state console featuring this timeless preamp was commissioned for a major London studio and the rest is history. Offering an unheard of 80dB of solid-state gain, the 73-style preamp is known for its beautiful coloration coming from not one but two input transistor gain stages as well as the incredibly low noise floor. The distinct Class-A gain staging of the 73-style preamp is still a favorite for many engineers today despite the decades of audio and electronic innovation since the introduction of this preamp. The 73-style preamps are known to color the signal earlier and impart more depth and space to the sound source compared to more punch from the 12-style American-inspired preamps. Open and spacious sounds in lead vocals, drum room mics and overheads, acoustics with wide stereo image all come to life with the depth and space offered by the 73-style preamp sound.
73-STYLE AMERICAN-VOICED PREAMPS:
SPOILER ALERT: When choosing between professional preamps built with quality components, there isn’t necessarily a ‘better’ preamp for a particular source. It all depends on the results you are trying to achieve. Knowing that things change from song to song, and source to source, there will likely be different preamp and mic pairings that will help you get the sound in your head. Now that we’ve covered the basic history and sound profile, let's look at some example applications and see how one of these preamps might help bring out the most in a particular performance.
Examples
Let’s look at how we could use certain preamps to achieve desired sounds by enhancing attributes of our performance and songwriting.

Example Setup: Acoustic singer-songwriter
Sources: Lead vocals, acoustic guitar
Associated gear: computer & DAW, 2-4 channel interface, 2-3 condenser mics, cables
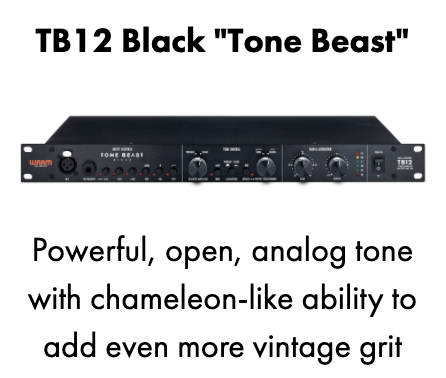
Preamp recommendation: TB12 Tone Beast ($649)
Why this recommendation?
The TB12 has the classic American, 12-style, high-headroom, analog warmth that you would expect out of discrete console-grade preamps. On top of that, the Tone Beast adds a tone control section changing the voicing from “vintage” to “clean” and selecting either steel or 50% nickel CineMag output transformers for varying character.
If you’re recording intimate vocals and acoustic guitar, you want to be sure that you leave room for the vocals and guitar to shine and step back where appropriate. Mixes with lower track counts can benefit from the added clarity and clean gain options the TB12 provides. If you’re looking for a more gritty, warm, and flavorful sound, the TB12 also adds extra tonal flexibility via selectable op-amps and transformers. Engaging the “vintage” setting will give you an alternative option to give different tracks their own unique tonal character. For a minimalist setup, like tracking one source at a time, one TB12 should cover you. If you prefer a more live feel, use two TB12’s for 2 channels of high quality and versatile mic pre’s running at the same time.
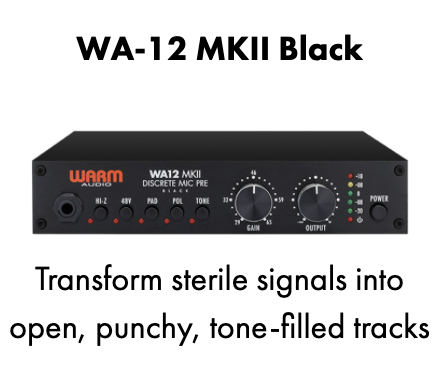
BONUS: If you want the live feel of two TB12’s but also prefer recording acoustic guitar with 2 mics simultaneously, consider adding a preamp like the WA-12MKII ($469) on top of the dual TB12’s. The WA-12MKII easily sits on top of your desk without needed racks for 2 channels of console-grade preamps running at once.
Example Setup: Piano and keys
Sources: Acoustic or pro stage piano (Ex: Steinway Grand, Nord, Yamaha, Kurzweil)
Associated gear: computer & DAW, 2-4 channel interface, 2-3 balanced TRS cables
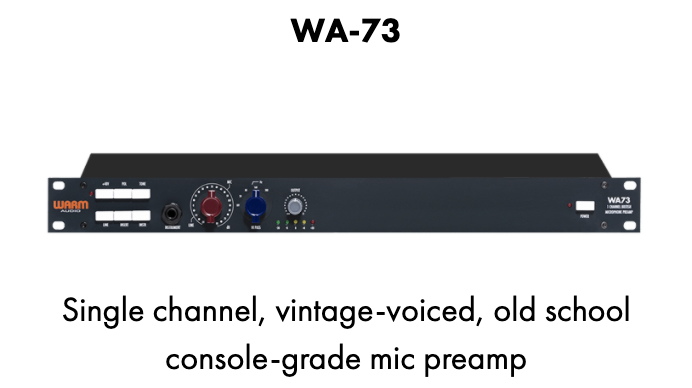
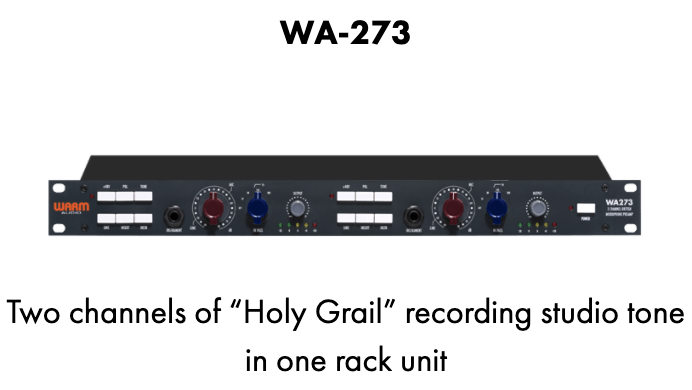
Preamp recommendation: WA273
Why this recommendation?
Not many sources span the tonal spectrum like pianos and keyboard sounds. There’s a reason why many pro stage pianos have 5-10 factory settings dedicated to the grand piano alone! Since this source has so much variance, you need a preamp that is very versatile with tonal options ranging from “clean” to “very colored.” If you need a “cleaner” sound, the WA273 is a perfect choice to run the keyboard with a little added “air.” If you’re looking to impart more analog warmth to your sound, driving the WA273 by raising the red gain knob engages more of the UK-made Carnhill transformers that are known to add a signature color that no other preamp can replicate.
BONUS: If you want the ultimate experience in tone-tweaking your signal on the way in, consider instead a WA273-EQ. The 273-EQ adds a three-band EQ section that is easily bypassable entirely or by each frequency-range if needed.

Example Setup: Multitrack drums
Sources: Acoustic drums (8X tracks)
Associated gear: computer & DAW, 8-12 channel interface, mic & TRS cables
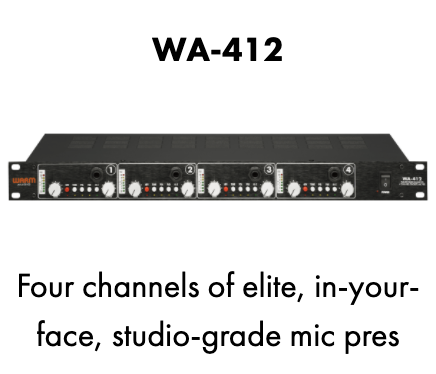
Preamp recommendation: (2X) WA-412
Why this recommendation?
It’s no secret that you can come up with a killer drum mic sound with only 3 microphones. But many drummers and engineers like the added flexibility of miking each individual drum if possible. Using two WA-412’s gives you two main benefits.
First - the WA-412 has the classic American, 12-style, high-headroom, analog warmth that you would expect out of discrete console-grade preamps.
Second - this setup allows the user to put one mic on each piece of a standard 5-piece kit with added hat and overhead mics. Things get even more creative on a 4-piece kit, where you can experiment with top/bottom snare mic techniques, far room mics, or outer kick drum mics. This 8-channel solution is a fantastic way to get classic, console-grade drum sounds for most setups.
BONUS: If you have the mics + interface inputs and you really want to take your drum sound to the next level - consider adding a WA273-EQ in addition to the WA-412. This will give you an alternative preamp sound that is more wide and warm, mixing vintage and modern tones for exceptional drum sounds. With this additional preamp, you could add and pair a far room mic on the drums with a snare top mic going into the 273-EQ. The added EQ lets you treat each mic differently and also gives you the flexibility in case you want to swap your snare top/bottom for an external kick drum mic. Add just the right reverb and compression for a huge sound, making no compromises between live and studio sound on the kit.